
Are you still using an email address that ends with @gmail or @yahoo? There’s nothing wrong with that! But what if I told you that having an email like that might be hurting your sales?
Perhaps you already knew that because you looked at these stats, but what if I also told you that your company email might be hurting you too?
In this article, I’ll show you the tools we use here at Databoy Pro Sites to ensure that our brand image and email deliverability are in tip-top shape. Let’s do it!
Why Use A Professional Email Address?
For one reason and one reason only, like content marketing, professional email addresses foster trust. In fact, three-quarters of consumers agree that branded emails are key to trust.
How To Create A Branded Company Email
Before going too far into our tutorial, it’s important to go over what will be required to get to the end.
There are actually only two things we’ll need to create professional email accounts, a domain name, and hosting. How much does each one cost?
Probably a lot less than you might think. Hosting can be as cheap as $1.88/mo. And domain names? As little as $0 (You read that correctly).
Now that we know the requirements to create a company email account, we’re ready to get the show underway.
Step 1: Choose a Namecheap Plan
To get started, let’s head over to Namecheap, one of the best and most affordable hosting companies around.
If you’re not sure what hosting is, no worries, you can just think of it as renting space on a server. If you’d like to learn more, check out our article What is Web Hosting.
Namecheap offers 3 main hosting plans, Stellar, Stellar Plus, and Stellar Business. Which one of these should you choose?
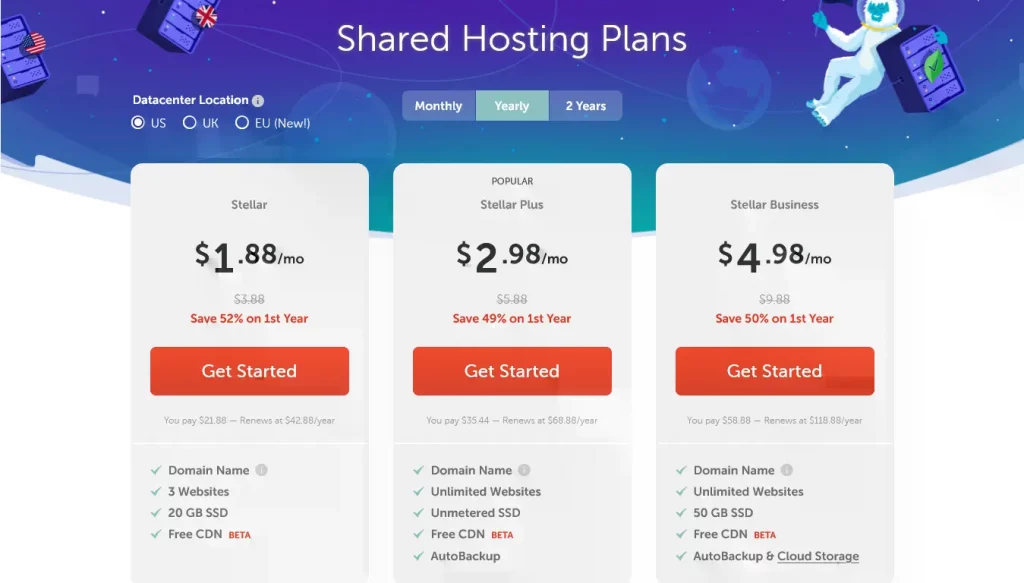
Stellar and Stellar Plus plans are the most popular among small businesses that are just getting started.
But each of the plans will allow us to create an unlimited number of email accounts, so you’re good whichever plan you choose.
With prices as low as just $1.88/mo it’s easy to see why Namecheap is so popular (it’s also easy to see where the name comes from).
To proceed, click the ‘Get Started‘ button under the plan you want.
Step 2: Choose a Domain Name (Web Address)
What is a domain name? In simple terms, a domain name is an address that tells computers where a server is located. Examples of domain names are facebook.com, prosites.co.zm, and mwale.me.
A pair of shoes purchased online can’t be delivered without an address. In the same way, emails can’t be delivered without an (IP) address.
Once you select a plan, Namecheap will give you the option to connect a domain name to that plan. This is a required step.
To choose a domain name, start by clicking the ‘New Domain Name’ option.

Afterward, use the search bar below to check if your desired domain name isn’t already being used by someone else. If it is, you can either modify the name or choose a different extension (TLD).
For example, when I tried to register mwale.com a few years ago (2018), I found it was already registered back in 2001 (yes, I was touched). So instead I registered a .me TLD and got mwale.me.
Pro tip: You cannot purchase some local domain extensions online. For example, co.zm, com.zm, and org.zm all cannot be registered on Namecheap. You can contact us if you need help registering a local domain.
Once you find an available domain, click the option ‘Connect to Hosting’.
Next, click the ‘Add to Cart’ button.
Finally, check the listed product details and confirm your order.
Discount: You can use the promo code NEWCOM598 at the checkout to get a .com domain for just $13.98 $5.98.
You will need to create a Namecheap account in order to proceed with your order. Creating an account shouldn’t take very long.

Simply choose a username and password, then type in your name and email address.
Once you have created an account and chosen a payment method, your order should run and you should then see a success page.
Step 3: Create your first Email Account
Amazing work!! You’re literally halfway there. What’s next?
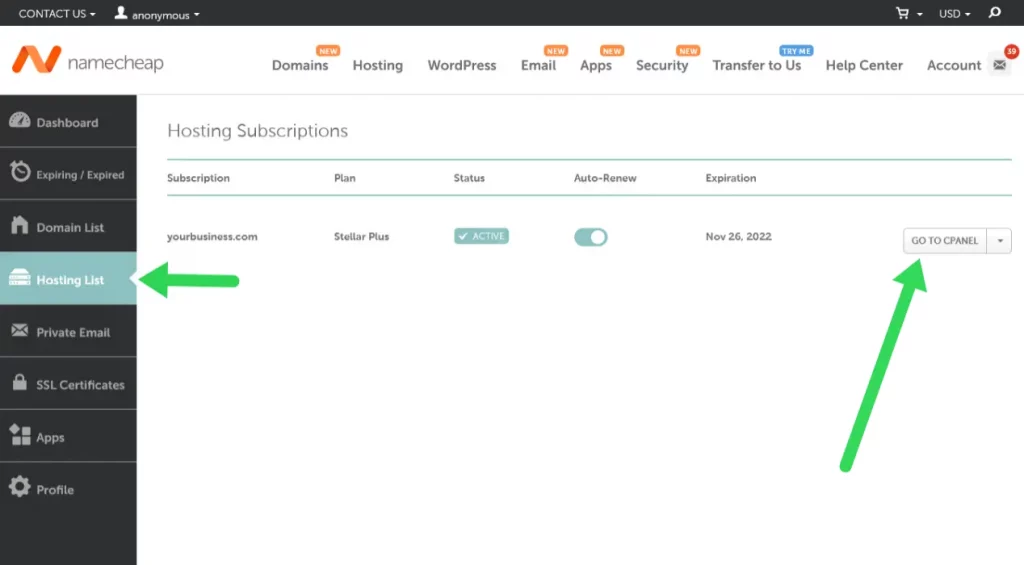
Log into your cPanel. To do that, visit your Namecheap dashboard by hovering over your username in the top left corner.
Next, visit the Hosting List page, find your hosting plan and click the GO TO CPANEL link.
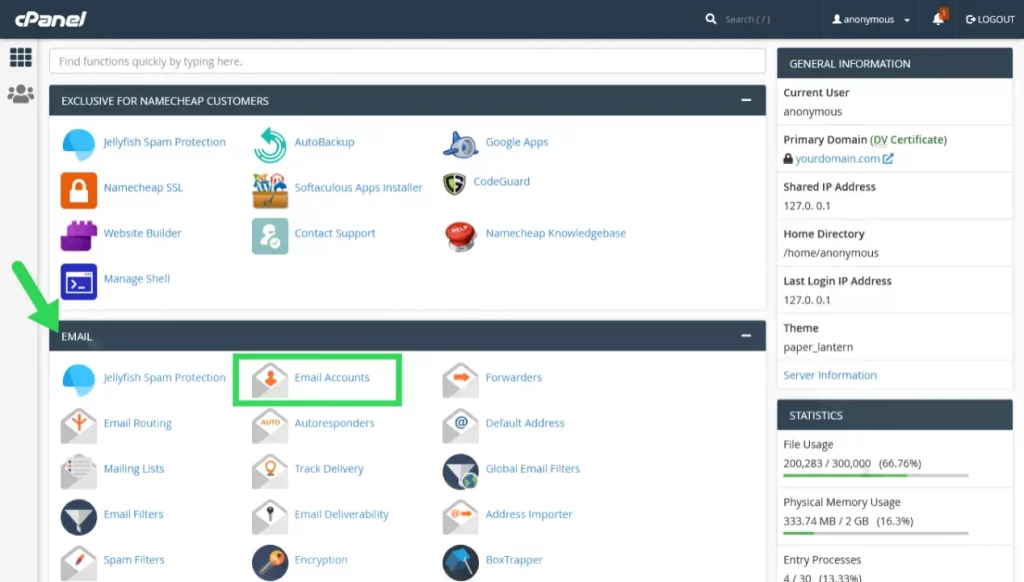
Once you’re logged into cPanel, you need to find the Email section and click the ‘Email Accounts’ link.
Click the ‘Create’ button and then choose a username and password for your email account.
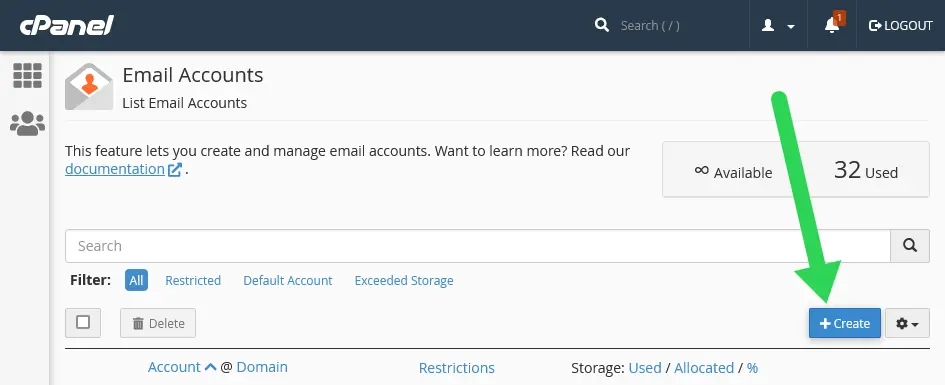
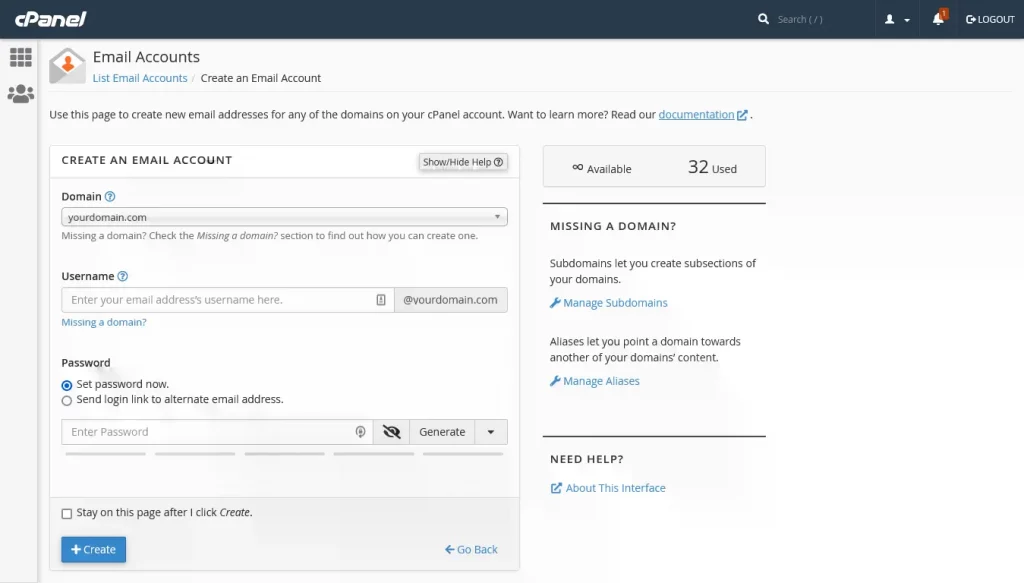
Rinse and repeat! You can create as many email addresses as you like :).
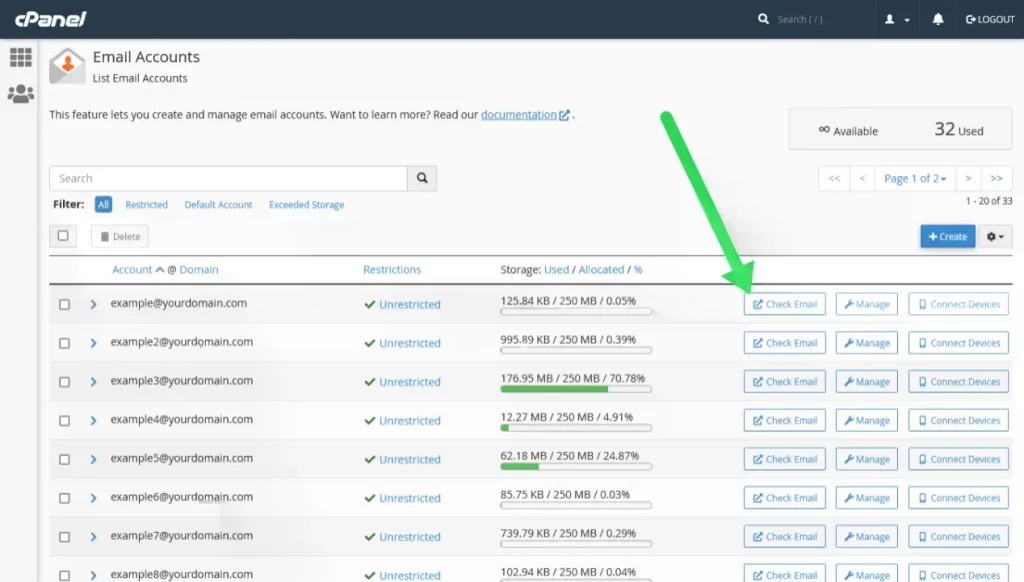
Step 4: Access Your Email Account at Namecheap
To access your email account just click the link “View Emails”. To recap, every time you want to access your email accounts, you’ll have to log in to cPanel and visit the Emails section.
Congratulations!!! You deserve a pat on the back, my friend! That’s all there is to it :).
Go to conclusion ↓ (skip advanced section)
Advanced: Avoid/Fix Common Email Deliverability Problems
To prevent your emails from going to the spam or junk folders of recipients, there are a few things you can do. In this section, I highlight steps that will help you avoid common deliverability problems, in general, including the one below.
Gmail couldn’t verify that [domain] actually sent this message (and not a spammer)
More than a quarter of the world uses Gmail, so chances are a good portion of the people to whom you send emails will be protected by Gmail’s advanced spam filters.
One of the things that Gmail may do to protect users is mark emails that are suspicious with the message “Gmail couldn’t verify that [domain] actually sent this message (and not a spammer)“.
This can make even your professional branded email look untrustworthy. But why does this problem arise?
Long story short, your email DNS records aren’t properly set. To prevent such warnings, you should make sure that your company emails have valid SPF, DKIM, and DMARC records.
MX Lookup
You can use MXToolbox for almost anything related to email DNS records, but we find it especially useful for diagnosing problems. For actual help to resolve problems that are identified on MXToolbox, keep reading.
SPF Checker
If you find that your domain is missing a valid SPF record, then you can use the SPF Record Check tool provided by dmarcian.
SPF Wizard
What if you don’t know where to find your SPF record or the record provided by your hosting company is being flagged as invalid?
You could contact your hosting company or alternatively, you could use the easySPF Wizard.
DMARC Wizard
DMARC is an email authentication protocol. In simple terms, it’s how you can ensure that no unauthorized people use your domain to send emails.
First, you may want to use a DMARC checker to confirm whether or not you need to create a DMARC policy.
If you don’t have one, you can set one up with the help of the DMARC Record Wizard.
Wrapping Up
Company emails are great for easily enhancing how your brand is perceived, but you will need to make sure that your emails are actually set up correctly.
Hopefully, this guide has helped you solve a company email deliverability problem or avoid one altogether. If you want to skip the process of setting all this up yourself, guess what?! We can help, just leave us a message :).
If you are strapped for cash, you can take advantage of our special deal for users in Zambia. Get a year of business email for just $5, you heard right, only $5.
Purchase Now